Lip Sync
- Josiah Forbes
- Dec 2, 2022
- 3 min read

Updated: Mar 16, 2023
Process Part 1
I started by drawing all the mouth shapes in illustrator using the pen tool. making sure that each mouth was on its own layer.


I also drew a Muybridge front facing character.
Before continuing u should have a Illustrator with al the mouth shapes drawn, and a separate or the same file with Muybridge with a Face, looking towards the camera
1 Adobe Animate New Project 1920 x 1080 pixels, 30 fps
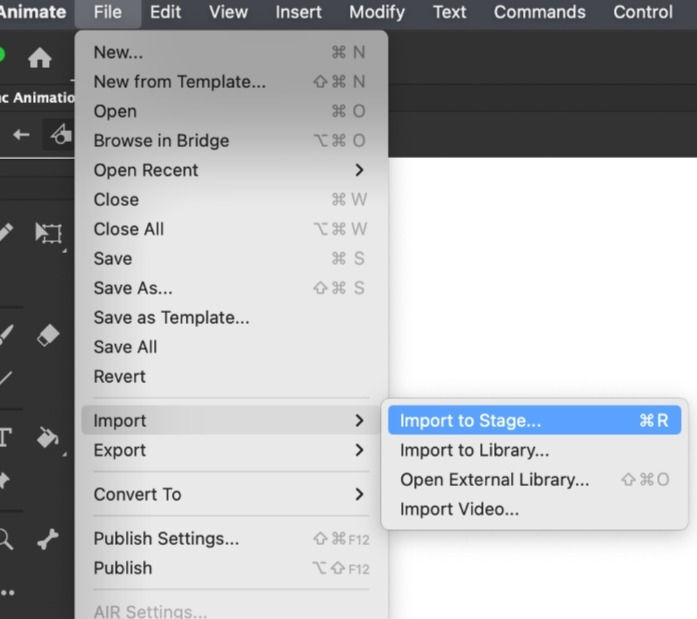
2 Go File > Import > Import To Stage


3. Import your Muybridge illustrator file. Choose only the layers of Muybridge, no mouths.
Import as Single Animate Layer.
Check Set stage size to same as illustrator artboard.
4: Convert Muybridge into a symbol. Modify > Convert To Symbol

5: Make sure he's a graphic.

6: Its a good idea to name your layer Muybridge, Body, Face, or whatever fits to keep organised.

7: make a new layer called Mouths

8:On the layer Mouths, On the frame 1 keyframe, go Insert > New Symbol

9: Name the symbol mouths and set it to graphic.

10: Go inside the mouths symbol. Do this by going Library, double clicking on the symbol Mouths

11 Inside the mouth symbol, go File > Import > Import To Stage
12: Select your illustrator file that has your mouths drawn on it.

13:, Select only the mouth layers to import. Set Convert Layers to: Keyframes


14: The mouths should be successfully imported now.
While still inside the mouth symbol, position each keyframe mouth to be in the centre of the screen. If your mouths are grouped correctly, u can use the right click and Align Vertical and Horizontal. if the groups don't work, just manually move them by dragging them.
Now all your mouths should be in the same location, each one on its own keyframe inside the Mouths Symbol
15: Go back out of mouth symbol, to Scene 1

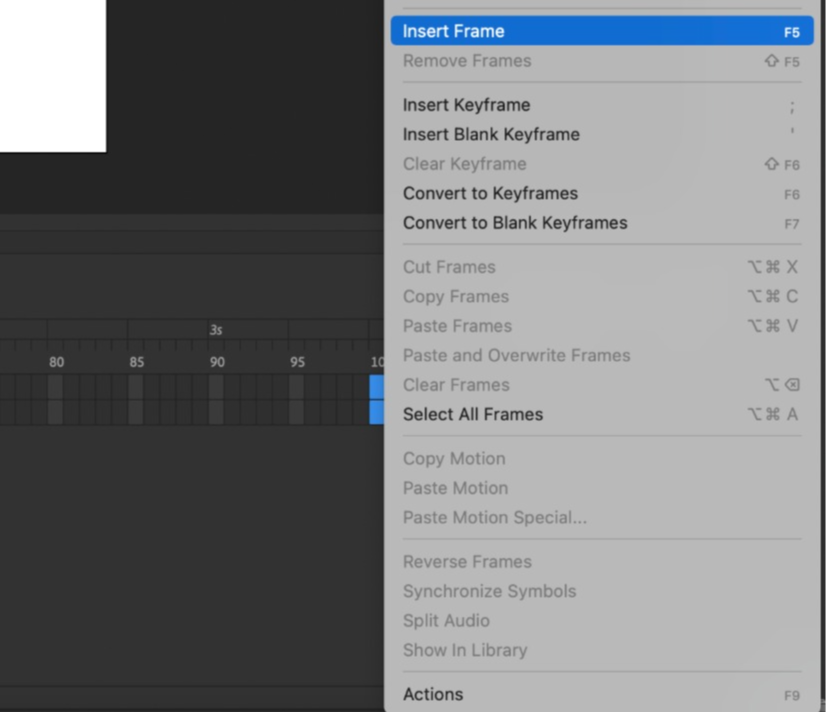
17: Add time on both the body and mouth layers, by selecting further down the timeline and Inserting Frames
Everything should look like this

19: Now drag the mouths symbol from the library onto the canvas and position it on the face.

20: Make a new layer for Audio.

21: In the new layer Audio, go File > Import > Import To Stage
Then select ur audio file

22: After Selecting your audio file u might get error depending on what type of file it is,

For me Mp3s did NOT work, I had to just use the default .Aifc which I got from recording with QuickTime player. You will have to try different formats and can use Adobe Media Encoder to change them.
23: Once u find a format the works and import it, The audio will be in the layer.

24: If u can't hear the audio make sure in Properties the Sync is set to Stream

25:Click on the mouths layer frame 1. In Properties under Object At the bottom click on Lip Syncing
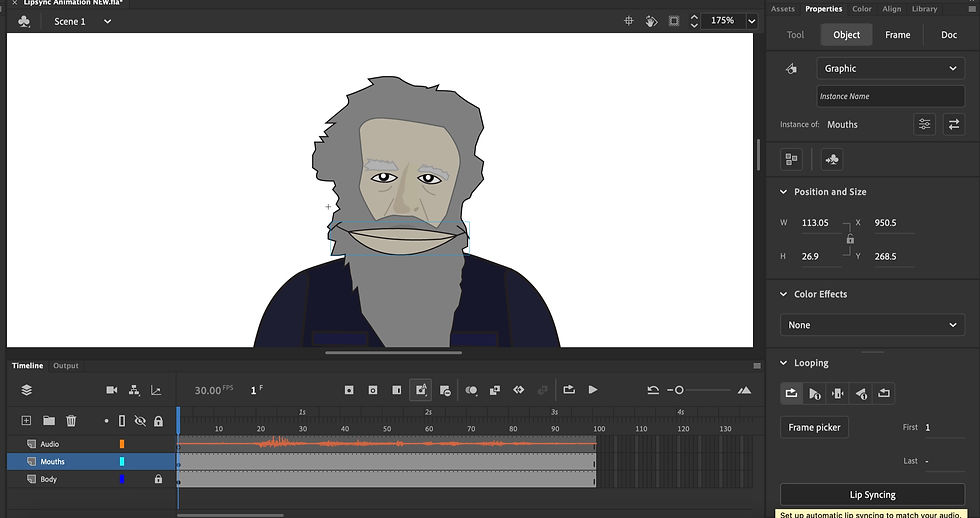
26: Click on each mouth shape and select your corresponding one. if all done correctly to this point they should be in the correct order already. When all selected press Ok/Done

27: Now the mouths will automatically sync, but it might look a bit delayed, If it does simply select the frames on the mouths layer, and move them forwards or backwards in the timeline to match the audio up correctly.

(I added a background on a new layer with the rectangle tool and paint bucket tool.
Notes taken in Lesson :
New 1920 1080
Import Muybridge character without mouths.
Convert to symbol, graphic
On new layer - Mouths, File > Insert New Symbol
Import the Mouth file and import as Keyframes
use anything, Quicktime, Audition, to create a audio recording, put into adobe Media Encoder, set to mp3 and run it.
(mp3s didn't work for me but AIFC from Quicktime Worked fine.)
Then on a new layer, Import to stage, select the mp3 file
On first keyframe make sure audio is set to stream in the properties.
*Adjust size and position of mouthes inside the symbol
In scene 1 Give all layers some time by adding frames
Drag Mouths symbol from library onto canvas on the mouths layer, move position onto the face of Muybridge. Select the symbol, Go. in the box in right of screen(Properties), Object, Click Lipsync, Select all of the mouth positions, Then select the audio layer to sync with. Now it will automatically apply the correct mouth position into the frames.

Comments